Please ensure Javascript is enabled for purposes of website accessibility
Laser treatment

All About Laser Treatments

If you’ve ever considered laser treatments for your skin concerns but have been worried about looking like a lobster for several months, we’ve got some good news. Laser treatments have advanced significantly since their inception and while there are treatments that will leave you looking like you just got a sunburn, there are also procedures and treatments that provide great results with minimal side effects.

What is a Laser and How Does it Work?
The word laser is actually an acronym for Light Amplification by Stimulated Emission of Radiation. What this boils down to is that lasers work by generating a concentrated stream of pulsed bright light that can be strategically controlled and directed over the surface of the skin. Unlike a regular white light bulb that contains a spectrum of colors, lasers only contain one specific color. These intense rays of light are used to destroy unwanted pigments, hair or other skin concerns. Lasers are classified as either ablative or non-ablative.

Ablative Lasers – Ablative lasers work by targeting the surface of your skin (epidermis) as well as the lower, deeper (dermis) layers of skin. In order to penetrate to these lower layers of skin, ablative lasers injure or ablate the surface of your skin. Ablative lasers can be used to:

  • Fade skin discolorations
  • Remove sun damage
  • Reveal healthier skin
  • Improve appearance of deep lines and wrinkles

Non-ablative Lasers – Non-ablative treatments target the lower layers of your skin, but they leave the surface of your skin undamaged and intact. Non-ablative lasers are used to:

  • Improve or eliminate redness from broken capillaries or rosacea
  • Remove superficial spots
  • Improve appearance of fine lines and wrinkles
  • Stimulate collagen production

Types of Lasers
Laser technology has advanced significantly since the treatments were first offered. Today’s lasers are able to provide more precise results with less damage and side effects. Some of the most common types of lasers used for laser therapy include:

  • CO2 Pulse Laser – This ablative laser is one of the oldest lasers in use. It provides significant results following therapy, but the side effects are intense with the potential for skin to remain red for up to two months following treatment.
  • Erbium YAG Laser – Another ablative laser, this machine is less invasive than the CO2 Pulse Lasers, but it also does not treat wrinkles as deeply as those machines. There is also the Variable YAG Pulse Laser, which is a popular option for its ability to work almost as effectively as the CO2 Pulse, but without as much damage.
  • Fraxels – These non-ablative lasers are some of the most frequently used because they deliver impressive results with minimal side effects and risks. The name is derived from the word fractional, which is how fraxels work. Instead of one, steady stream of light, fraxels pinpoint target the skin with a polka-dot type pattern of light that causes less tissue damage. Fraxels are used for a large range of skin concerns from wrinkles and stretch marks to hyperpigmentation.
  • Long-Pulsed YAG Laser – This laser is also non-ablative and is used mainly for wrinkles and reducing the appearance of acne scars. These lasers, while less invasive than others, provide more subtle results than others.

What to Know Before Laser Therapy
That’s definitely a question for your doctor to decide. If you are considering laser therapy, it is a great idea to do some research, but remember that your doctor is the expert. Look for offices that feature multiple types of lasers, because an office that only has one may use it on your skin to keep your business, but it may not be the most effective or safe treatment for you. Laser therapy costs range widely depending on the type of laser, the number of treatments, your location and what type of laser therapy you are having done. Laser therapies come with varying amounts of pain. The majority of laser treatments do not require numbing before the treatment, but if you are having deeper resurfacing done, your doctor may use “…a topical anesthetic or a combination of a topical and pain injections plus anxiety drugs such as Ativan or Valium,” says Brian Biesman, clinical assistant professor at Vanderbilt University Medical Center in Nashville.

Laser treatments are an effective way to treat a large number of skin concerns from resurfacing to deep-set wrinkles. Prior to undergoing any type of laser therapy, we recommend doing some research to find a doctor that you trust and the laser treatment that is right for you.

Portrait of smiling mature woman with white hair

Makeup Tips for Mature Skin

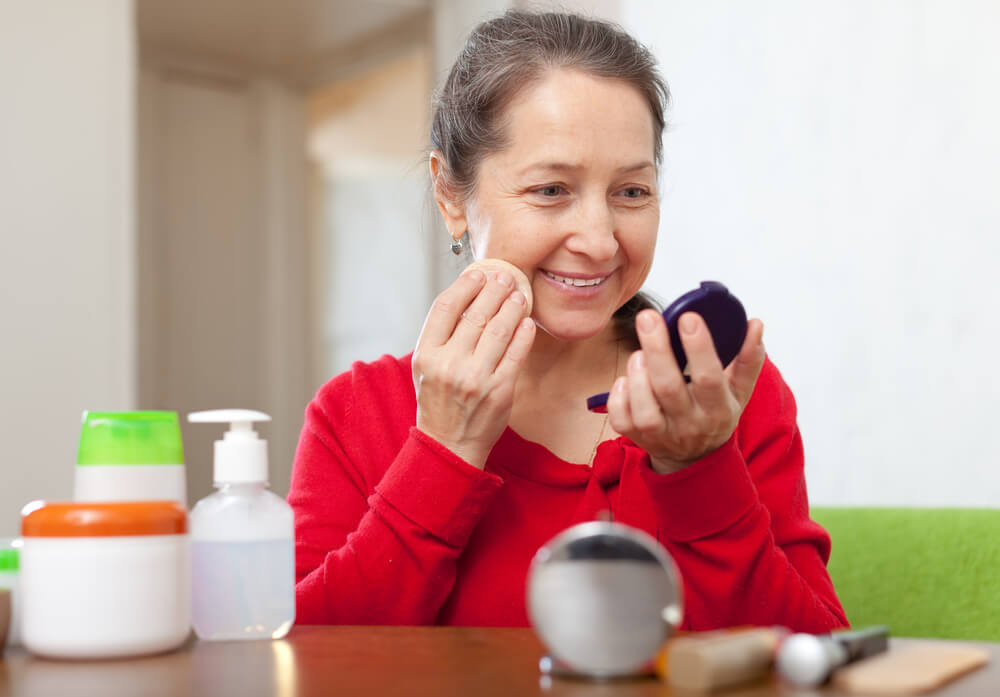
It is so easy to fall into a beauty rut, using the same cosmetic products decade after decade. However, your skin, as well as your features, change as you age, meaning that your makeup products and application techniques need to evolve too.

From foundation to lipstick, here are some guidelines when it comes to makeup for mature skin.

Start With Your Skin

The best-looking makeup begins with good skin, which is why this should always be your initial focus when evaluating cosmetics.

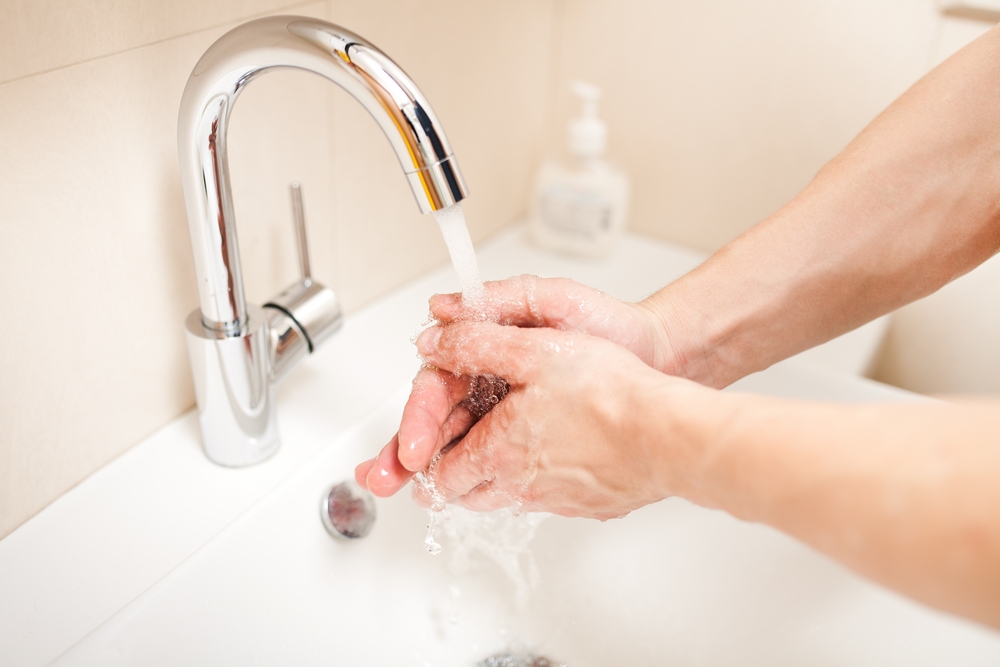
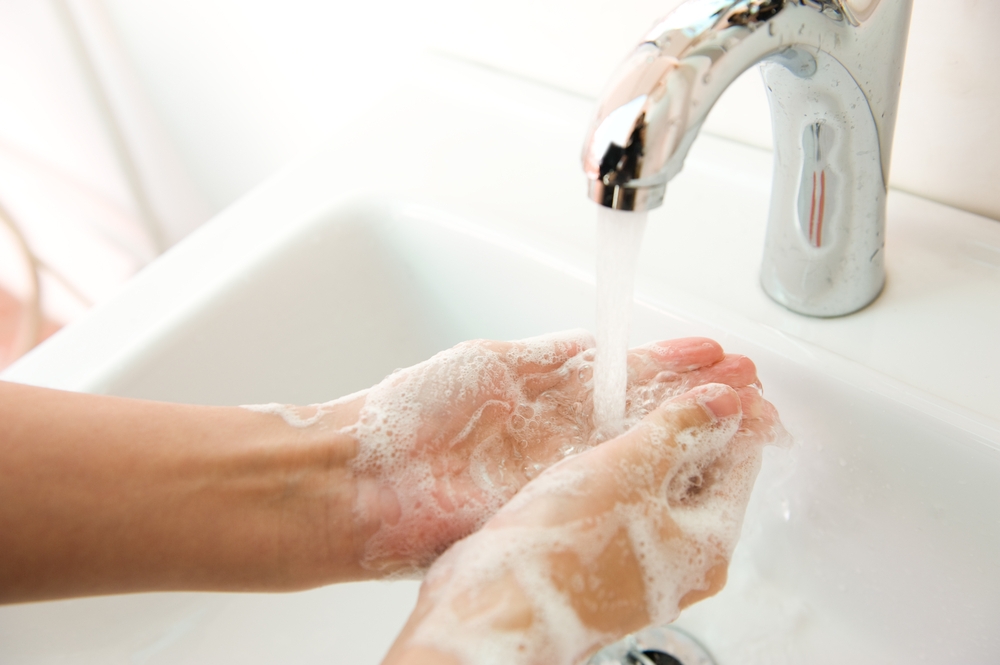
Before applying any makeup to your face, you need to ensure that your skin has been thoroughly cleansed. Exfoliating it will be a bonus, as this will clear away any dead skin cells and rough patches from the surface of your skin, giving you a blank canvas to work with when it comes to your makeup.

Immediately after exfoliating, you need to moisturize your skin.

This is even more important for mature skin…

Why?

Because one of the main skin issues that mature skin faces is a lack of moisture, as skin loses its ability to retain moisture as it ages. This can result in a rough and dry complexion, which will only end up being accentuated, rather than hidden, by your makeup.

A thick and rich moisturizer is best, and it should also contain plenty of antioxidants, such as vitamin C and resveratrol

Another bonus to moisturizing before applying any makeup?

It will give your face a smooth and dewy finish, meaning that your makeup will just glide effortlessly on afterwards.

woman applying primer or moisturizer

Primer

Primers are not strictly essential, but do have quite a few benefits, especially when it comes to mature skin.

Here are a few of the reasons as to why you should be using a primer:

  • Hides visible pores
  • Smooths and softens the skin
  • Gives makeup a base to grip on to, meaning it lasts for longer 
  • Prevents foundation from oxidizing and changing color

When choosing a primer for mature skin, you want the formula to be a lightweight and moisturizing one, without containing any shimmer. As with any product you use, try to pick one that contains added antioxidants. If your skin is sensitive, look for a primer that contains soothing ingredients, such as niacinimide or green tea. 

Foundation

When it comes to choosing a foundation for mature skin, thick formulas, or loose powders, are a big no.

woman applying powder foundation

Why?

These products will only end up settling into any creases in your face as your skin moves, making any fine lines or wrinkles so much more visible.

Instead, go for a light liquid foundation, or a cream foundation.

Wondering what the main differences between the two are?

Well, a cream foundation is more opaque, meaning that it provides better coverage if you have age spots or broken capillaries. Using a cream foundation means that you will likely need to use less concealer on any of these blemishes.

Another bonus to using a cream foundation formula is that these will usually be more moisturizing, making them great for drier skin types.

On the other hand, a liquid foundation will tend to have a lighter texture, and, if you only have a few minor imperfections, a liquid foundation will likely do the job.

When it comes to actually applying your foundation…

Begin at the center of your face, and use a foundation brush to blend this outwards.

Wondering how to stop your foundation from settling into any lines or wrinkles?

This is often inevitable, no matter which foundation you choose. When this happens, all you need to do is blot the area with a Q-tip, before fixing it up with some powder.

Alternatively, if you are dealing with fine lines rather than deeper wrinkles, try pressing a finger gently against your skin, rocking it back and forth in a slight rolling motion. This will help to disperse the foundation that has settled into your lines.

Don’t like using foundation but still want a bit of coverage?

Try a CC cream instead. These are actually perfect for mature skin, because not only will they disguise any redness or imperfections, but they will also refine your skin’s texture.

Concealer

While some may strongly believe that a concealer should be applied before a foundation, it should really be the other way round.

Why?

Because your foundation will already cover up quite a few imperfections, so you will only need to use the concealer on areas that actually need the extra coverage

Want to know the best way to use a concealer to hide blemishes?

Simply dab a small amount onto your blemish, and then use the tip of a brush to blend this into your foundation, until you cannot see it any more.

In addition to using your concealer to cover up any blemishes, you can also apply it in a way that will help to give your face more of a lifted appearance.

How?

Use your concealer to draw a triangle on your cheek, with the base of the triangle underneath your eye, and the other two sides pointing down towards your cheek. Then, blend it in.

woman using concealer under her eyes

So, how do you actually go about choosing a concealer for mature skin?

Well, just like with your foundation, liquid or cream formulas are best. Liquid is usually preferred by those with mature skin, as its lightweight texture means that it is less likely to gather in wrinkles and creases during the day. If you opt for a cream, you may need to set it with a powder afterwards to ensure that it does not crease.

You will also likely need two different shades, one for underneath your eyes and one for your face.

Here are some tips on choosing the two shades:

  • For underneath the eyes, choose a concealer that is one or two shades lighter than your natural skin tone. However, do not go any lighter than this, otherwise you may end up with an obvious light circle around your eyes
  • For the face, your concealer needs to perfectly match the shade of your foundation

Blush

While a cream blush looks great on bare skin, a powder blush tends to be the better option if you are also wearing foundation. However, in order not to dry your skin out, you need to make sure that you opt for a powder that has a fine and light texture.

When it comes to color, do not be tempted by strong and harsh shades. As the face ages, it becomes more angular, and stronger shades of blush will only make this seem hollow.

Instead, go for a softer shade, such as apricot or rose, making sure that it complements your skin tone.

Woman applying makeup

When it comes to actually applying your blush…

Many tend to apply this on the apples of their cheeks, but this often only ends up drawing attention to sagging skin.

What should you do instead?

Apply your blush to the highest point of your cheekbones, using a large brush to lift this upwards, making sure that you do not apply any color too close to your nose.

Eyes

Did you know that your eyes change shape as you age?

Your eyelids become more hooded, while wrinkles around the eyes can also affect their shape.

So, what is the best way to deal with this when it comes to eye makeup?

A subtle wash of a light colored shadow is really all you need, with satin finishes in particular helping to brighten up the eyes. Matte and sparkly shadows do not work too well on mature eyes, as these tend to settle into the fine lines on eyelids, making them looked creased.

If you do decide to go for a shadow with some sparkle or shimmer for a special occasion, keep this away from the outer corners of your eyes, as it will only emphasize fine lines. Instead, keep the sparkle for your inner corners, the center of your eyelids, and your brow bones.

What about eye liner?

This is great to make your eyes really pop, but a liquid or gel formula can sometimes be too harsh on mature eyes, making an eye liner pencil your best option.

Do you find an eye liner pencil difficult to apply?

This is a common issue, but an easy solution is to just make sure that your eye liner pencil is soft, so that the color comes out smoothly and easily.

When applying your eye liner…

Make sure that you apply more to your top lash line than your bottom.

Why?

Because this helps to prevent your eye liner from dragging your eyes down. Eyeliner on your lower lash line will also make your eyes look much smaller, and will draw attention to any dark circles. Try to also ensure that the line you draw becomes thicker towards the outer edge, because this will give you a lift in an area where mature eyes tend to droop.

Do not forget about your eyebrows either…

Eyebrows naturally thin with age, and filling these in can really subtract decades from your appearance. Use either a light colored brow pencil or a shadow, as you want the color to look subtle and natural. Make sure that you blend this in well, following your eyebrow’s natural shape and ensuring that they do not look as though they have been drawn on. 

Just like with your eyebrows, your eyelashes will also naturally thin with age…

Mascara is great for this, but do not be afraid to experiment with individual false eyelashes, as these are perfect for filling in any gaps.

Giving your eyelashes a curl before applying your mascara can also make a huge difference, as this will instantly open up your eyes, making them appear bigger and brighter.

When applying mascara to mature eyes, you would be best off staying away from your lower lashes, and only applying it to your top lashes.

Why?

Because mascara on your lower lashes will only emphasize any dark circles or crow’s feet, whereas a deep, black mascara on your top lashes only will make your eyes look brighter and whiter.
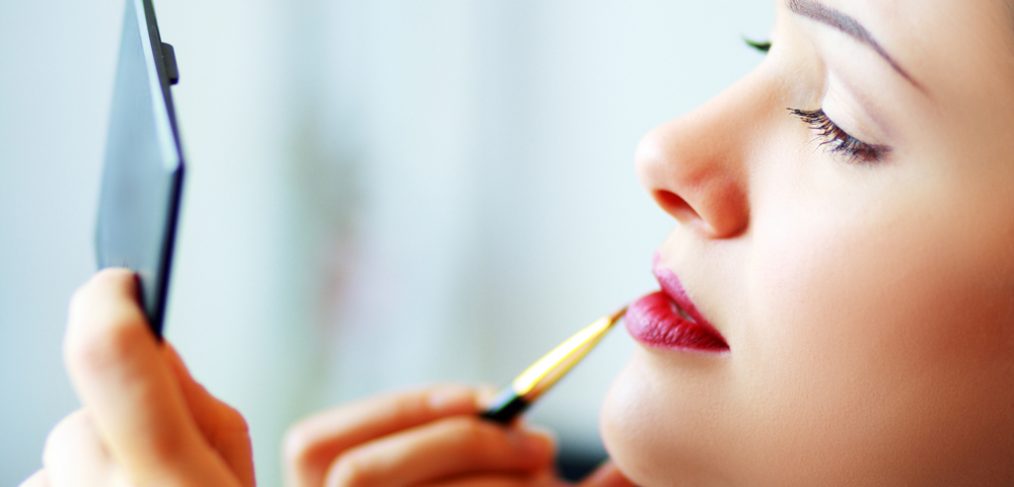
Lips

Your lips will change quite a bit as you age, becoming much thinner, with wrinkles appearing around them. 

This means that you will want to use makeup in a way that plumps your lips out, so that they appear fuller and smoother.

How can you do this?

With a sheer, moisturizing lipstick. Neutral shades are usually best, as you want to enhance the shape and color of your lips without drawing too much attention to them. The most flattering shades for mature lips tend to be a color that is only slightly darker than your natural lip color.

senior woman applying lipstick

Try to avoid dark or bright lipsticks, as well as those with a satin finish.

Why?

Because these often only end up drawing attention to thinner lips, as well as to fine lines.

Don’t forget about lip liner either…

This can be used to give your lips a slight boost in volume, while also preventing your lipstick from bleeding into any wrinkles or lines. All you need to do is trace the lip liner around the outside of your lips, so that you have slightly over-lined them. However, make sure that the shade of lip liner you choose matches the shade of lipstick that you are going to be wearing with it, and try not to be too heavy-handed when applying the lip liner

Wondering whether or not you should be wearing lip gloss?

The answer is no. While there is no denying that lip gloss can really help to plump up your lips, it will also highlight every single fine line that is on your lips, so is best avoided.

In order to really look your best as you age, your makeup needs to evolve in the same way that your face and features do. From your eyes to your lips, make sure that you are constantly assessing each individual feature, so that you can determine exactly what they need in order to really shine.

Woman applying lipstick.

Anti-aging Makeup: How Resveratrol is Making its Way Into Cosmetics

We love resveratrol, and we have been big fans of this potent antioxidant for some time. The benefits that resveratrol provides are so incredible and so varied. From anti-aging to fighting cancer, resveratrol truly is a superior antioxidant. Quality skin care lines have been incorporating resveratrol into their products for some time, and now it seems that the entire beauty industry is taking note.

Resveratrol and Aging
Resveratrol is a chemical produced by various plants in order to fight off attackers or to withstand a lack of water or essential nutrients. Resveratrol is a powerful antioxidant that protects your cells against free radical damage. Free radicals are created by exposure to oxygen and sunlight, and they damage collagen and other active enzymes necessary for healthy, youthful looking skin. The subject of much scientific study, how resveratrol works is just now being understood. It is thought that resveratrol works not only by eradicating existing free radicals, but also prevents new free radicals from forming. Applied topically, resveratrol has also been shown to inhibit UVB oxidative stress and to prevent UVA damage.

Resveratrol Beauty Products
While skin care is currently the biggest source of resveratrol products in the industry, makeup companies are beginning to follow suit. BITE beauty, founded in 2011 is one brand that has started incorporating the power of resveratrol into their cosmetics. BITE was conceived when founder Susanne Langmuir developed sensitivities to non-natural beauty ingredients and fragrance chemicals. The idea behind the BITE brand was, “you eat what you put on your lips, so your lipstick should be good for you.” The result was a collection of moisture-rich and creamy lip products that were made using antioxidant ingredients which are actually good enough to eat.

The BITE Luminous Creme Lipstick, is a long-lasting, moisturizing lipstick made from 95% natural contents. One of these natural antioxidant ingredients is resveratrol. The concentration of resveratrol in each lipstick is equal to anywhere from five to 10 glasses of wine. BITE Luminous Creme is available in 24 shades, so you’ll certainly be able to find one that suits you and that protects your lips against early aging.

Perhaps the greatest benefit of skincare and makeup products that contain resveratrol is the level of resveratrol you receive. As we noted, one BITE Luminous Creme Lipstick contains concentrations equal to five to 10 glasses of red wine. While you can certainly receive the benefits of red wine by ingesting it, the concentration of resveratrol is significantly higher in products designed for topical use as opposed to drinking wine. Consuming resveratrol does not provide as much of the antioxidant than topical skincare and cosmetic items containing this skin-saving ingredient. A great beauty routine starts with excellent skincare, but using makeup that contains resveratrol is a great way to increase your defenses against aging and environmental damage.

Nutrient supplements

Judging Vitamin A Supplements: Which are the Best?

Vitamin A is absolutely critical for proper body functioning. This vitamin works in many areas of your body from your eyes and skin to your bones and reproductive system. Dietary sources of vitamin A are plentiful, particularly among fruits and vegetables like carrots, kale, spinach and sweet potatoes. If you are worried about a deficiency in vitamin A, talk to your doctor about vitamin A supplements.

Why Take Vitamin A Supplements?
Vitamin A is essentially a blanket term used to describe retinoids. Retinoids are biologically active complexes found in both plants and animals. Vitamin A is essential for your body as it assists with numerous aspects of your overall health. Perhaps most famously, vitamin A is vital to your eye health. Remember the whole carrots are good for you saying? While it’s not entirely true, it’s also not entirely false. The beta-carotene in carrots converts to vitamin A in your body, and benefits your eyes by helping you distinguish colors, protecting the cornea (outer surface of the eye) and preventing vision loss. Additionally, vitamin A has been shown to reduce the risk of macular degeneration, though more study is needed.

It isn’t just your eyes that benefit when you are receiving proper vitamin A levels. Vitamin A is also essential for bone growth, reproduction and your immune system health. You may be familiar with vitamin A as retinol, one of the greatest skin care ingredients you can use. Vitamin A repels bacteria, making it an excellent anti-acne treatment, and helps to turn over newer, healthier skin cells.

How Much Vitamin A do you Need?
The amount of vitamin A, like all vitamins, depends upon several factors including your age and gender. In general, the following are the recommended daily intake of vitamin A:

  • Men – 3,000 IU (900 micrograms)
  • Women – 2,300 IU (700 micrograms)
  • Pregnant Women – 2,600 IU (770 micrograms)
  • Lactating Women – 4,300 IU (1,300 micrograms)

Because vitamin A can interact with other things and because taking too much causes adverse health reactions, it is highly recommended that you consult with your doctor to learn the appropriate daily intake for you.

Which Vitamin A Supplements are the Best?

  • NOW Foods Vitamin A from Fish Liver Oil – These are a highly rated supplement with satisfied customers raving about improved vision and skin.
  • NOW Foods Beta-Carotene – This supplement is produced from carotenoids that occur naturally in D. salina sea algae.
  • Nature Made Vitamin A – The Nature Made Vitamin A supplements take their primary source of vitamin A from sardine liver oil.
  • Source Naturals Vitamin A – These tablet use palmitate and are suitable for vegetarians.
  • Solgar Dry Vitamin A – Derived from deep-sea, cold-water fish these softgels have been molecularly distilled to remove any contaminants.

Warnings About Vitamin A Supplements
It is definitely true that vitamin A is crucial for your body, but there are some caveats when taking vitamin A. The U.S. National Library of Medicine states vitamin A may be unsafe when taken orally in high doses. Long-term use of large amounts of vitamin A might also cause serious side effects such as irritability, fatigue, anorexia, mental changes, nausea, stomach discomfort, vomiting, excessive sweating, mild fever, and more.

Experts recommend trying to get your daily intake of vitamin A from dietary sources and to use supplements as needed. Because there are potential interactions with medications or other herbs and supplements, it is advised to check with your doctor before beginning a vitamin A supplement regimen. Specifically related to beta-carotene, smokers are advised against using the supplement as it can increase the risk of lung cancer, though more research is required. Use of vitamin A supplements can be a great way to make sure you aren’t deficient in vitamin A, but be sure to consult with a healthcare professional so you take vitamin A supplements safely.

Child eating a carrot

Live Well: Can Vitamin A Improve Your Eyesight?

When you parents told you to eat your carrots because “they’re good for your eyes,” they weren’t just trying to get you to eat more vegetables. Carrots by themselves certainly are not solely responsible for your eyesight, but the vitamin A that is contained in carrots is definitely an important factor in your overall eye health.

What is Vitamin A?
Vitamin A is a group of unsaturated nutritional organic compounds and these compounds are responsible for the maintenance or regulation of a variety of functions in your body. There are two types of dietary vitamin A: preformed vitamin A and pro-vitamin A. Preformed vitamin A is prevalent in meat, poultry, fish and dairy products. Pro-vitamin A is found in plant-based foods like fruits and vegetables. The most common form of pro-vitamin A found in plant-based sources is beta-carotene.

Vitamin A and Eyesight
Vitamin A does promote good visions and it is especially important for your ability to see in the dark or areas that are not well lit. This fat-soluble vitamin is also important because it aids your eyes in distinguishing colors. Another reason vitamin A is so essential for eyesight is that this vitamin protects your cornea, the surface of your eye. The mucous membrane that covers your eyes is responsible for acting as a barrier to keep viruses and bacteria your eyes, preventing infection. Vitamin A is so crucial to your eyesight that frequently the earliest and most common signs of a vitamin A deficiency are night blindness and/or vision loss.

Vitamin A and Overall Eye Health
In addition to improving and protecting your eyesight, there are multiple other eye disorders and conditions that vitamin A helps combat. Dry eye syndrome is uncomfortable, but highly treatable with eye drops. Vitamin A can fight some types of eye inflammation and the use of vitamin A eye drops can help cure dry eye syndrome. One study found that using over-the-counter lubricating eye drops with vitamin A was every bit as effective as using a more expensive prescription eye drop treatment for dry eye.

A study sponsored by the National Eye Institute suggests that vitamin A in conjunction with other antioxidants may play a role in decreasing your risk of macular degeneration, a condition that results in vision loss. Macular degeneration affects 10 million Americans, more than glaucoma and cataracts combined. The study focused on age-related macular degeneration and it indicated a 25% reduction in the risk of age-related macular degeneration over a six-year period.

Vitamin A not only improves vision, it also prevents the risk of vision loss and increases your overall eye health. The best way to get some added vitamin A is to increase your consumption of foods that are rich in vitamin A. Dietary sources of vitamin A include carrots, beef liver, kale, spinach and sweet potatoes. Vitamin A supplements are also an option for increasing your vitamin A intake and your parents were right….carrots are good for your eyes.

Healthy colorful salad

Eat Well: Recipes High in Vitamin A

Vitamin A is essential in order for your body to function healthily. The National Institutes of Health Office of Dietary Supplements says, “[v]itamin A is important for normal vision, the immune system and reproduction. Vitamin A also helps the heart, lungs, kidneys and other organs work properly.” One of the other organs that vitamin A benefits is the largest organ of your body, the skin. Vitamin A is excellent for helping to treat acne and aging and it was the first retinoid to be approved by the FDA to effectively treat wrinkles. While vitamin A may help skin a bit more when applied topically, having some in your body certainly helps your skin and it provides essential functions for other areas of your body. Here are our three favorite fall recipes that are high in vitamin A.

Seared Sesame Tuna

Seared Sesame Tuna
Tuna is a good source of vitamin A. In a one ounce serving of tuna, you receive around 15% of your daily recommended amount of vitamin A. This recipe calls for 6 oz tuna steaks, meaning that your seared sesame tuna accounts for over half of your daily recommended amount of vitamin A.

Ingredients:

  • 4 tuna steaks (6 oz)
  • ¼ cup low sodium soy sauce
  • 2 tablespoons sesame oil
  • 1 tablespoon raw honey
  • 1 tablespoon mirin (a sweet Japanese wine)
  • 1 tablespoon rice wine vinegar
  • 1 tablespoon olive oil
  • ½ cup black sesame seeds

Grab a small bowl and add soy sauce, sesame oil, raw honey and mirin together and divide into two equal parts. Pour one part into another bowl. Stir in rice wine vinegar and set aside. Spread black sesame seeds out on a plate. Brush soy sauce mixture onto the tuna steaks and press lightly into the sesame seeds. In a pan, heat olive oil on high heat. When very hot, place tuna steaks in the pan and sear each side for about 30 seconds (or longer depending on how you prefer your tuna cooked). Remove from pan and serve with the dipping sauce you set aside.

Roast Veggies

Harvest Vegetable Bake
This comforting dish combines three amazing sources of vitamin A. Just a one-cup serving of kale provides you with 354% of your daily recommended amount of vitamin A. This recipe also calls for red bell peppers, sweet potatoes and squash which are all great dietary sources of vitamin A.

Ingredients:

  • 3 tablespoons olive oil
  • 2 tablespoons butter
  • 1 pound sweet potatoes diced
  • 2 red bell peppers diced
  • 1 small acorn squash diced
  • 1 shallot finely chopped
  • 2 teaspoons garlic powder
  • 1 cup chopped kale
  • 4 sprigs fresh sage
  • Salt and pepper to taste

Add olive oil and butter to a pan over medium heat. Allow butter to melt, then add the sweet potatoes, bell peppers, squash and shallot. Season with garlic powder and salt and pepper to taste. Cook over medium heat for 25 minutes, or until potatoes are tender, stirring occasionally. When sweet potatoes are tender, stir in the chopped kale and sage. Continue to cook over medium heat for five more minutes, until kale is wilted.

Dried Apricot Jam

Dried Apricot Jam
Dried apricots can be enjoyed on their own, but for a bit of variety mix up this tasty jam that a perfect addition to your morning oatmeal of slice of toast. A half-cup serving of dried apricots contains 151% of your recommended daily amount of vitamin A.

Ingredients:

  • 4 ½ cups dried apricots
  • 4 ½ cups boiling water
  • 1 teaspoon vanilla bean paste (or vanilla extract)
  • 1 cup stevia powder (or less depending on how sweet you want your jam)
  • ¼ cup lemon juice
  • 1 1.75 oz package powdered fruit pectin

Bring water to a boil and add dried apricots. Cook for 30 minutes, or until apricots are hydrated. Take the apricots and water and place in a food processor with vanilla bean paste. Working in small batches, blend until well combined but still slightly chunky. In a large pot over medium heat, combine the processed apricot mixture with pectin and cook just until boiling. Add stevia powder and lemon juice and boil until dissolved, about one to two minutes.

In a stock pot, sterilize jars and lids for canning for five minutes. Pack apricot jam into jars, leaving about ¼ inch of room at the top. Once jars are filled, run a butter knife along the inside to get rid of any air bubbles and remove any jam residue from the rims of the jars. Add lids and screw on rings. Place a rack in the bottom of the stock pot and fill about halfway with water. Bring water to a boil, then using a holder, place full jars on the rack. Leave space between each jar and if necessary pour more water into the stock pot, enough so that there is about one inch of water on top of the jars. Bring the water to a roaring boil, cover the pot and allow 10 minutes to process. Remove jars from the stock pot and allow to fully cool, about one hour. When cool, press the top of each lid down to ensure it is airtight for storage.

Carrots, bell peppers, squash, kale and other dark, leafy greens and tuna are all excellent sources of dietary vitamin A. You can whip up a simple kale salad for lunch and add some chopped bell peppers, carrots and sliced tuna on top. Eating for your body doesn’t have to be boring or difficult, these three fall recipes that are full of vitamin A are simple, delicious and nutritious.

Peppermint oil.

Your Guide to Essential Oils

For centuries, essential oils have been used for a large variety of cosmetic and medicinal purposes. Knowing which essential oils to use for your specific concerns can be a bit overwhelming if you’ve never tried them before. Here, we’ve listed our top three essential oils that are perfect if you’re looking to learn more about how essential oils can benefit your overall health.

Lavender oil

Lavender
Lavender is one of the most widely used essential oils and rightly so because it is a versatile essential oil. Perhaps the most frequent use of lavender essential oil is to soothe emotional stress and increase feelings of relaxation. Lavender can help to release nervous tension, and relieve symptoms of depression. Physically, lavender helps to reduce inflammation in your body and can help alleviate headaches or migraines. Lavender is one of the essential oils that can be used safely on your skin and a few drops on your wrist or the nape of your neck may help to soothe you and eliminate headaches. If you have difficulty sleeping, add a few drops of lavender essential oil to a spray bottle filled with water. Mist lightly on your pillow before going to bed.

Peppermint
Peppermint is another hugely versatile essential oil providing benefits that range from headache and nausea relief to stimulating alertness. Stomach related uses for peppermint oil include relieving an upset stomach or indigestion, reducing motion sickness and even helping to curb your appetite. If your stomach is upset, try rubbing a few drops of peppermint oil onto your abdomen or dab onto your wrists. Simply inhaling peppermint oil’s scent can help you feel more full, but you can also place a bit on your wrists or a tiny (seriously an itty bitty drop) right under your nose before eating. Peppermint oil is also used to treat stress; place a few drops in a diffuser and feel the tension melt away. Another incredibly common use of peppermint oil is to eliminate headaches and stimulate energy. Place a few drops on the nape of your neck to take care of your headache and re-energize yourself.

Tea tree oil.

Tea Tree
Tea tree is not an essential oil that is commonly associated with aromatherapy, but it has incredible benefits. This essential oil is used frequently to treat skin problems such as blemishes, dandruff, athlete’s foot and minor cuts, scrapes and burns. While some can tolerate this oil directly on the skin without dilution, it’s generally recommended to add a few drops of tea tree oil to water or a carrier oil (such as jojoba or sweet almond oil) before applying to your skin. Once you have diluted the tea tree oil, rub onto cuts, massage into scalp or apply on blemishes. You can also add a few drops to your shampoo to receive anti-dandruff benefits without having to purchase an entirely new shampoo. A mixture of tea tree oil and water in a spray bottle is also a great way to sanitize beauty products such as tweezers or makeup brushes due to the antibacterial properties in tea tree oil.

It is important to note that while many essential oils are considered safe for skin, some like tea tree or bergamot may burn skin. Always do a patch test on skin before using an essential oil topically to be sure you won’t have a negative reaction. Other ways to use essential oils include diffusers, sprays or simply opening a bottle and inhaling. Our lifestyle partner, 21 Drops, offers custom essential oil blends to keep you energized, calm, happy and healthy.

Woman painting

Live Well: Ways to Instantly Improve Your Mood

If you’ve ever thought to yourself that it will nice to be happy someday, listen up. You don’t have to make happy an abstract goal for your future, you can do things to make yourself happy in the next few minutes. We put together three of the quickest and easiest ways you can instantly improve your mood no matter where you are or what you’re doing.

Woman sitting besides a pond.

Head Outside
You know the saying ‘you’re only one workout away from a good mood?’ It’s completely true, but it can be difficult to increase physical activity during periods of depression or great stress. Even if you don’t have added feelings of lethargy from depression, it can be difficult to find time for a workout in the middle of your workday when you find yourself stressed and anxious. Taking a brisk walk can significantly boost your mood and energy levels, and venturing outside for your walk is even more beneficial. Research points to the fact that sunlight stimulates chemicals in your brain that help improve your mood. You don’t have to spend your entire lunch hour outside working up a sweat, just a 10-minute brisk walk is all you need to feel reinvigorated. And if you absolutely can’t get outside due to location or weather, spend some time roaming the office halls or walking the stairs for a quick burst of energy.

Chamomile Tea.

Drink Chamomile Tea
Chamomile tea has long been a bedtime remedy for those who have trouble falling asleep and recent studies show that drinking this tea really is effective at reducing anxiety or feelings of stress. In a study conducted by the University of Pennsylvania, 57 participants who had been diagnosed with generalized anxiety disorder were given chamomile supplements for a period of eight weeks. The results were a significant drop in anxiety levels and increased feelings of calm. Research from the University of Maryland Medical Center suggests that in addition to promoting calm, chamomile tea can promote sleep. Drink a cup of chamomile tea after a hectic work meeting in the afternoon or at the end of the day to promote peaceful, calm feelings or to really unwind, turn off your electronic devices (yes, including the TV and your cell phone) and enjoy a cup nightly with a book or your favorite music playing. This helps create a ritual that your body associates with feelings of rest and relaxation.

Aromatherapy oils.

Use Aromatherapy
For centuries, aromatherapy and essential oils have been used to address a vast number of concerns that include soothing ailments both physical and mental. The next time your mood declining, try one of the following essential oils. Lemon is particularly helpful when you are feeling angry, anxious or rundown and exhausted because it promotes concentration in addition to containing calming and clarifying properties. If you’re feeling sad or depressed, try jasmine. Jasmine, like lemon, also has a soothing effect, but it also helps lift your mood by increasing optimism, energy levels and confidence. When you need to really unwind and relax, reach for lavender because lavender soothes nerves, relieves nervous tension and can help control depression. One of our lifestyle partners, 21 Drops, features incredible, unique blends of essential oils in a fun and convenient packaging so you can take your essential oils with you wherever you go and not have to worry about spills or bulky glass containers.

It would be amazing to be calm, happy and energetic all the time, but that just isn’t very realistic. That doesn’t mean, however, that you have to just muddle through feelings of anxiety or depression. These three tips help you to instantly improve your mood, helping you to tackle stress and negativity in a positive way.

Woman with the flu

Live Well: 5 Feel Better Tips for Flu Season

According to the Centers for Disease Control and Prevention, “it is estimated that in the United States, each year on average 5% to 20% of the population gets the flu and more than 200,000 people are hospitalized from seasonal flu-related complications.” You may just consider the flu an uncomfortable nuisance, but it can be quite severe. Flu season is just around the corner, so we’ve compiled a list of our five best feel better tips for flu season.

Vaccine.

Get Vaccinated Early
If you’ve ever been vaccinated with the flu only to end up in a bed for a week, it might be due to the timing of your flu vaccine. The flu vaccine takes roughly two full weeks to take effect, so if you head to your doctor in the middle of a nasty outbreak, you may end up coming down with the flu before your body has sufficient time to build antibodies. Keep in mind that the flu vaccine is not 100% effective at preventing the flu, but it is associated with lower hospitalization rates in both children and adults.

Washing hands.

Wash Your Hands
You hear this advice all the time, but with good reason. Sudsing up your hands and scrubbing them often is one of the best ways to prevent coming down with the flu. Dr. Fran Wallach, hospital epidemiologist at the Mount Sinai Hospital and associate professor Medicine, Infectious Diseases as the Icahn School of Medicine at Mount Sinai says, “[t]he two most important things you can do for yourself to avoid the flu is to get an actual flu vaccine and the second is to have good hand hygiene.” Your hands are in constant contact with germs and many viruses spread when your fingers make contact with your mouth or eyes. Washing your hands helps to eliminate that risk. If you can’t make it to a sink, it’s a good idea to carry hand sanitizer with an alcohol content of at least 60% on you so you can sanitize when you need to.

Washing hands with soap

Wash Your Hands…Correctly
When washing your hands, use warm water and soap and lather together for at least 20 seconds. As you lather, be sure to get under your nails, between your fingers, the fronts and backs of your hands and go up the wrist a bit. After 20 to 30 seconds, rinse and then dry with a dryer or paper towels. Avoid using shared towels, where germs and bacteria can grow. If you’re using hand sanitizer, be sure to use enough to thoroughly cover the hands (about a nickel sized amount) and rub the solution into your hands for 15 to 20 seconds.

Woman walking on a treadmill.

Get Moving
Engaging regularly in moderate exercise is associated with a stronger immune system and the CDC recommends being active as one way to combat getting sick. Take advantage of the beautiful fall scenery with a hike or park as far away as possible at the mall when doing your holiday shopping to get some extra walking in. If you feel like hitting the gym, head over to the treadmill for some brisk walking, use the stair-climber or sign up for a yoga class.

Woman down with the flu.

Stay Home
Taking a sick day sometimes seems like a complete luxury, but during flu season it’s best to think of staying away from work as a necessity. Not getting enough sleep in itself is a factor in contracting the flu because lack of sleep is associated with lower immune functions, so it’s extra important to be sure that you are getting plenty of sleep when you do have the flu. But staying home isn’t only about you and your rest. The flu can be active in your body without you experiencing any symptoms of the illness and by the time you do display flu symptoms, you are definitely contagious. Avoid getting sicker and infecting those around you by taking a few sick days to fully rest and recuperate. When you absolutely must leave your home, be sure to cover your nose and mouth when coughing or sneezing (into your elbow is the recommended method).

Healthy habits and good hygiene are two of the most important factors when it comes to avoiding the flu this season. Children and the elderly are among those with the highest risk of catching the flu, so it is especially important to use these tips if you fall into, or if you care for someone who falls into, those categories. Using these five feel better tips helps you to survive flu season as healthy as possible.

squash food

Eat Well: Fall Squash Recipes

Pumpkin is actually a type of squash and it tends to steal the show during fall. However, other varieties of squash are just as delicious and versatile when it comes to fall cooking and baking. Our favorite squash recipes cover the basis from traditional, cozy classics such as a cream soup to zesty, Mediterranean-inspired spaghetti squash. Whip up these recipes for a delicious taste of fall.

Butternut Squash Cream Soup

Butternut Squash Cream Soup

Ingredients:

  • 2 (8 oz) packages cream cheese
  • 6 cups peeled and cubed butternut squash
  • 3 cups water
  • 6 tablespoons chopped yellow onions
  • 4 tablespoons butter
  • 4 cubes chicken bouillon
  • ½ teaspoon dried marjoram
  • ¼ teaspoon black pepper
  • ⅛ teaspoon cayenne pepper

Saute butter and onion until tender in a large saucepan. Add squash, water, chicken bouillon cubes, marjoram and black and cayenne pepper. Bring everything to a boil and cook until squash is tender, about 20 minutes. In one cup batches, puree the soup mix and cream cheese until smooth in blender or food processor. Return pureed soup to the saucepan and heat thoroughly, but do not allow to boil.

Mediterranean Spaghetti Squash

Mediterranean Spaghetti Squash

Ingredients:

  • 1 spaghetti squash seeded and halved lengthwise
  • 1 ½ cups diced tomatoes
  • ¾ cup crumbled feta cheese
  • 3 tablespoons sliced black olives
  • 2 tablespoons fresh basil chopped
  • 1 onion diced
  • 1 clove garlic minced
  • 2 tablespoons olive oil

Lightly grease a baking sheet and preheat oven to 250 degrees Fahrenheit. Place spaghetti squash cut side down on the greased baking sheet and bake in preheated oven until a sharp knife can be inserted with just a little resistance. This process usually takes about 30 minutes. Remove from oven and set aside while allowing the spaghetti squash to cool. Heat olive oil in skillet over medium heat. Add onion and cook until translucent and tender then add garlic. Cook until fragrant, about two to five minutes. Finally, add tomatoes and olives and stir just until warmed through. Scoop the stringy pulp from the cooled spaghetti squash and place in a bowl. Add vegetables and feta cheese and toss together.

Roasted Butternut Squash

Roasted Butternut Squash

Ingredients:

  • 1 butternut squash peeled and cubed
  • 2 garlic cloves minced
  • 2 sprigs fresh rosemary finely chopped
  • 2 tablespoons olive oil
  • Sea salt and cracked black pepper to taste

Preheat oven to 400 degrees Fahrenheit. Toss butternut squash, garlic, rosemary, olive oil and salt and pepper together until thoroughly mixed. Spread evenly into a large baking dish. Bake in preheated oven until squash is tender, caramelized and golden brown, about 45 to 50 minutes.

Roasted Acorn Squash

Parmesan Roasted Acorn Squash

Ingredients:

  • 2 lbs acorn squash halved lengthwise, seeded and cut into ¾ inch slices
  • ¼ grated Parmesan cheese
  • 8 sprigs fresh thyme
  • 2 tablespoons olive oil
  • ½ teaspoon sea salt
  • ½ teaspoon cracked black pepper

Preheat oven to 400 degrees Fahrenheit. Toss squash slices with olive oil, Parmesan cheese, thyme sea salt and black pepper until evenly coated. Place slices on baking sheet and roast in oven until the squash slices are tender and golden brown, about 25 to 30 minutes.

Squash is excellent during any time of the year, but it is particularly festive during the fall. Our favorite fall squash recipes only scratch the surface of what you can create using squash as your primary ingredient. Make a traditional Bolognese sauce for spaghetti squash or use butternut squash in place of yams for your Thanksgiving casserole. Gather your ingredients and your family and create a comforting fall squash meal tonight.

logo

UNLOCK
20% OFF

Sign up and get 20% off your first purchase!

No thanks, I'll pay full price